Thursday, 9 July 2015

24v Starter Circuit

The Brise starter works fine while the battery is fully charged, however when the battery drops to around 12 volts the cranking speed drops and makes the engine difficult to start. 

After talking to Rich at RLM he suggested changing to a 24v starter circuit and wiring in an additional battery. The new battery is wired in series after the output from the start solenoid before the starter motor. As I had a spare battery I decided to give it a go and mounted the battery in the passenger footwell. 

The engine now cranks faster than ever and starts a lot more consistently. I am currently still using the Brise starter but I may swap back to the standard hayabusa starter at a later date.


Brake Upgrade

With the extra power I decided to upgrade the brakes. I have not really been happy with the brakes since I built the car.

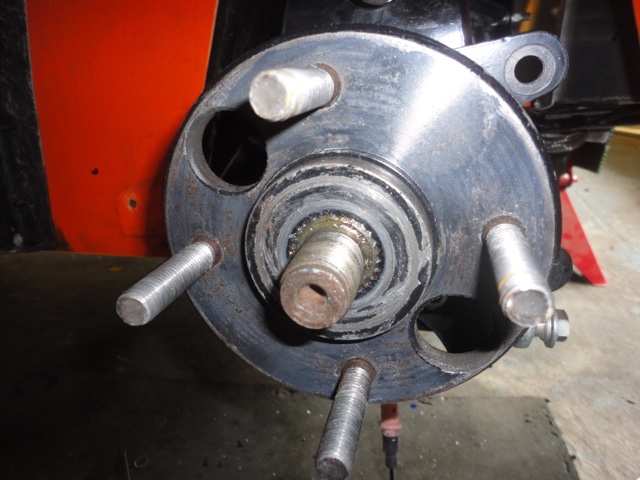
MNR now provide light weight discs and billet bearing carriers. I decided to upgrade to these and also fit a pair of rear wildwood calipers for the rear to replace the Sierra items. As these catch on my 13 inch Compomotives there is an added bonus with the wildwood's that they wouldn't catch.

The only downside was that I needed the rear hubs machined to fit the new discs, I sent them to MNR to get this done, Marc machined them down to size within a couple of days. 

The kit was a straight swap and fitted well, when fitting the new bearing carriers I took the opportunity to fit new rear bearings. 

I took time to bleed the brakes, after I bled the rear calipers from the bottom and then from the top, the brake pedal became extremely solid with good feel. I think that the rear calipers may have been a problem all along.


Rear LED Lights

With the old clear Perei lights I had a couple of occasions that the driver behind couldn't see me braking. This is something that I have been thinking about for a while and thinking of an LED upgrade.

I managed to find some LED rear lights that fit the existing back boxes. Ideally I would have liked them to be clear but I couldn't find any, that were the same size. 

I swapped the lights and fitted a new electronic flasher relay, I'm really quite pleased with the results, the lights are now a lot brighter. 


Turbo Plenum Straps

Made up some straps from strips of aluminium, used the engine mounts and plenum fixings to hold in place.


Sunday, 21 June 2015

Turbo Mapping at RLM Racing

Took my car to RLM Racing to be mapped, all in all the car was on the dyno for a couple of days and I am really happy with the results. 

I asked Rich to map the car so that it would be drivable and to have a progressive power curve. Looking at the dyno plots he achieved this quite nicely. 

The MBE 9A9 ecu was set up to have switchable maps for different levels of boost. Low boost at 0.6 Bar, medium at 1 Bar and high at 1.3 Bar. This equates to around 250 / 310 / 400 wheel Hp. I have the option to cap the boost in the lower gears and then to fit front wheel sensor for traction control. I will try capping the boost in 1st and 2nd gears for the time being.

The GT28/76 turbo was the limiting factor and would not achieve more than 1.4 Bar and then tailing off to 1.3 Bar. With a larger turbo the engine is capable of making more power but may cause turbo  lag. For now 400 wheel hp will be plenty. 

On higher boost the plenum blew off so I will need to makeup some straps to keep it I place, Rich wired it down temporarily.

The charge cooler performed well and managed to keep inlet temperatures at a reasonable level, looking forward to see how it performs on the road and track.

Next step is to upgrade the brakes and wait for the weather to get better.


Tuesday, 5 May 2015

Turbo Final Assembly

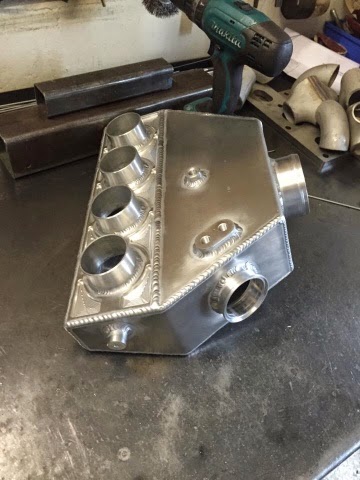
Fitted the plenum and connected to the throttle bodies with 50mm long silicone joining sections. Had connections fitted to the ends of the plenum to allow straps to be fitted to hold down the plenum under boost. 

I fitted the boost Pipework and used 3 inch aluminium tubing between the elbows. The charge cooler is 3 inch in and out and then the plenum is also 3 inch. Covered the charge cooler in reflective heat shield to try to keep the coil cool and to reduce heat soak from the engine bay. 

Fitted a second water pump and radiator for the cooling water system on the charge cooler. The  pump runs when the engine is running and circulates water between the rad and the charge cooler core.

The car is now off to RLM for mapping, so fingers crossed for a good result.


Monday, 27 April 2015

Hayabusa Turbo Plenum

The plenum has been made for me by G19 Engineering, Doug made the plenum for me based on my  design. I am really happy with the results.

The base is made from billet and had been cnc machined for precision. The inlets have been machined beveled for maximum air flow. 

The take offs at the bottom are for boost pipes to the map sensor and the fuel pressure regulator. The temp sensor fits in the centre.


Sunday, 29 March 2015

Turbo Raceco Exhaust

Fitted a 3 inch Raceco titanium exhaust silencer. Used a Caterham exhaust bracket that I bought online and fixed to the body tub with a large repair washer on the inside. This fits perfectly with the angled Caterham style bracket on the end can.

The silencer is incredibly light and the quality is superb, the silencers finish really goes well with the brushed stainless down pipe. 


Tuesday, 3 March 2015

Lock Up Multi Stage Clutch

Managed to get a good deal on a MTC multi stage lock up clutch kit from a drag racer. The kit was fitted to a 620hp turbo hayabusa and used for full bore launches at 10,000 rpm. So should be more than capable to stop my clutch slipping with the higher power engine.

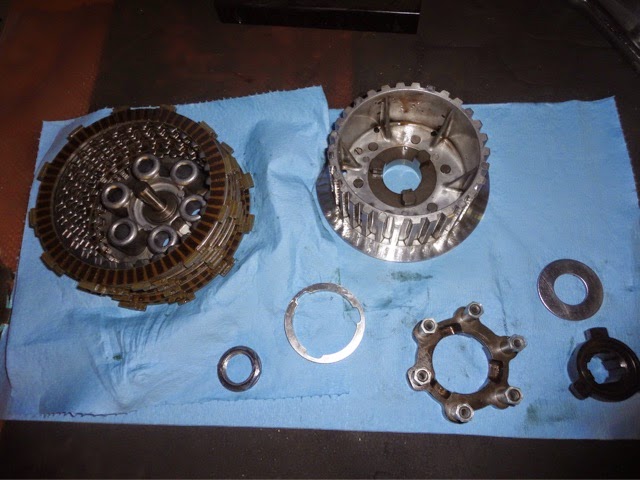
The clutch kit comes with a MTC billet inner hub that completely replaces the stock clutch centre and back torque limiter, a billet clutch basket, a modified clutch pressure plate, updated springs, and an updated clutch centre that has spring loaded arms that sequentially push the pressure plate down above 5,000 rpm and locking the clutch in place. There is also a larger billet clutch cover with a removable access lid for easy clutch adjustments. 

I decided to keep the Extreme Engines billet basket and to put the MTC item on eBay, which I'll list at a later date. In a drag application where the clutch is designed to slip before it locks, the racers often run more steel plates than fibre. For the time being I am going to run the standard clutch set up with the half plate at the back swapped for a full plate.