Saturday 25 October 2014

Turbo Rebuild #7 - Top End Assembly

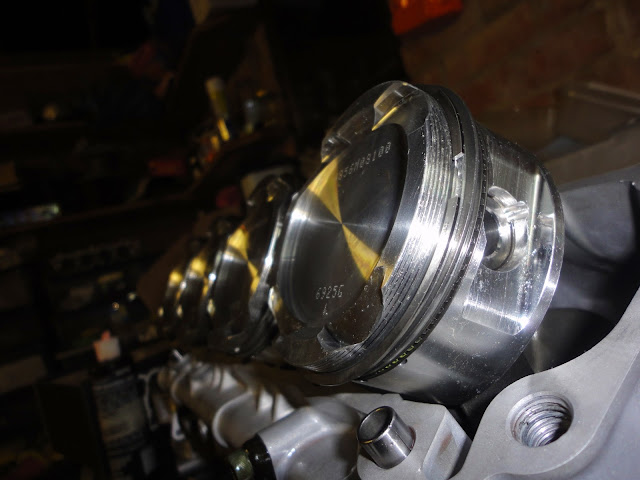
Fitted the pistons back in order and made sure that the arrow faced forwards. Adjusted the rings so that the gaps are in opposite directions on the piston. 

Fitted the new base gaskets and the aluminium spacer, the thickness of the spacer and gasket combined needed to be 1mm thicker than before to allow for the extra stroke on the gen 2 crank. I sandwiched the spacer plate in between the base gaskets, in taking this approach I do not need to bond the base plate. 

Lubricated the bores and piston sides with assembly oil. Rotated the crank so that Pistons 2 & 3 were raised, then lowered tha cylinder in to position and eased the rings in to place with a small screwdriver. Then repeated with Pistons 1 & 4 until they were in place. Rotated the crank by hand to ensure that everything rotates easily. 

Fitted a new head gasket and then positioned the head, lubricated the head studs with engine oil and tightened them down from the centre outwards. Torqued all of the bolts to 50NM then to 70NM and then finally to 100NM.


Saturday 18 October 2014

Turbo Rebuild #6 - Billet Clutch Basket Install

Installed the clutch basket, fitted the Extreme Engines aluminium clutch spacer plate that sits behind the clutch centre. The spacer is designed to remove the ramp system and give a more positive feel to the clutch.

Next I fitted the clutch centre and a new centre nut. I then used a punch to bend the lip over to lock in to place. Added the clutch plates with the thick plates on the inside and outside, the steels with the curved edge facing inwards.


Turbo Rebuild #5 - Charge Cooler

The charge cooler that I bought on eBay has now arrived from the U.S. The build quality looks ok but for less than £100 then it's worth a try.

I have a couple of options of where to mount the cooler, one option to mount horizontally above the front suspension uu der the nose cone and the other option vertically at a lower level between the chassis cross brace and the front suspension, roughly underneath the red end caps.

Need to make a mounting plate and fixing brackets. I will have to work out how to vent the water jacket when it is fixed on its side, may carefully drill the end plate and fit a vent near the top above the water inlet.

Will fit a small radiator under the existing one and re use the old electric water pump to circulate the coolant. Would like to fit a header tank but may run in to problems as the charge cooler is fitted quite high up, if not I'll have a closed system.


Monday 13 October 2014

Turbo Rebuild #4 - APE Balancer Replacement & Uprated Oil Gear

As I have a balanced crank, the counter balancer is longer needed, so I decided to fit the APE balancer  shaft replacement. The replacement item just bolts in to place, it should save a few pounds and may help the engine rev a little faster.

Fitted a new gear selector sensor and an uprated oil pump gear.


Turbo Rebuild #3 - Billet Clutch Basket

Assembled the billet clutch basket kit, the aluminium billet looks sturdy in construction. The kit re uses the existing springs and flywheel like many others on the market.

Drilled out the rivets on the back of the flywheel and removed the backplate, noticed that the basket was starting to show signs of wear around the springs.

Removed the flywheel and springs, checked for wear. Trial fitted to the back of the new billet basket and fitted the bevelled washer. Fitted the new back plate and then bolted in to place. Torqued up the bolts to 40ft/lbs and stud locked the nylock nuts.